Table of Contents
1.Understanding the overall picture
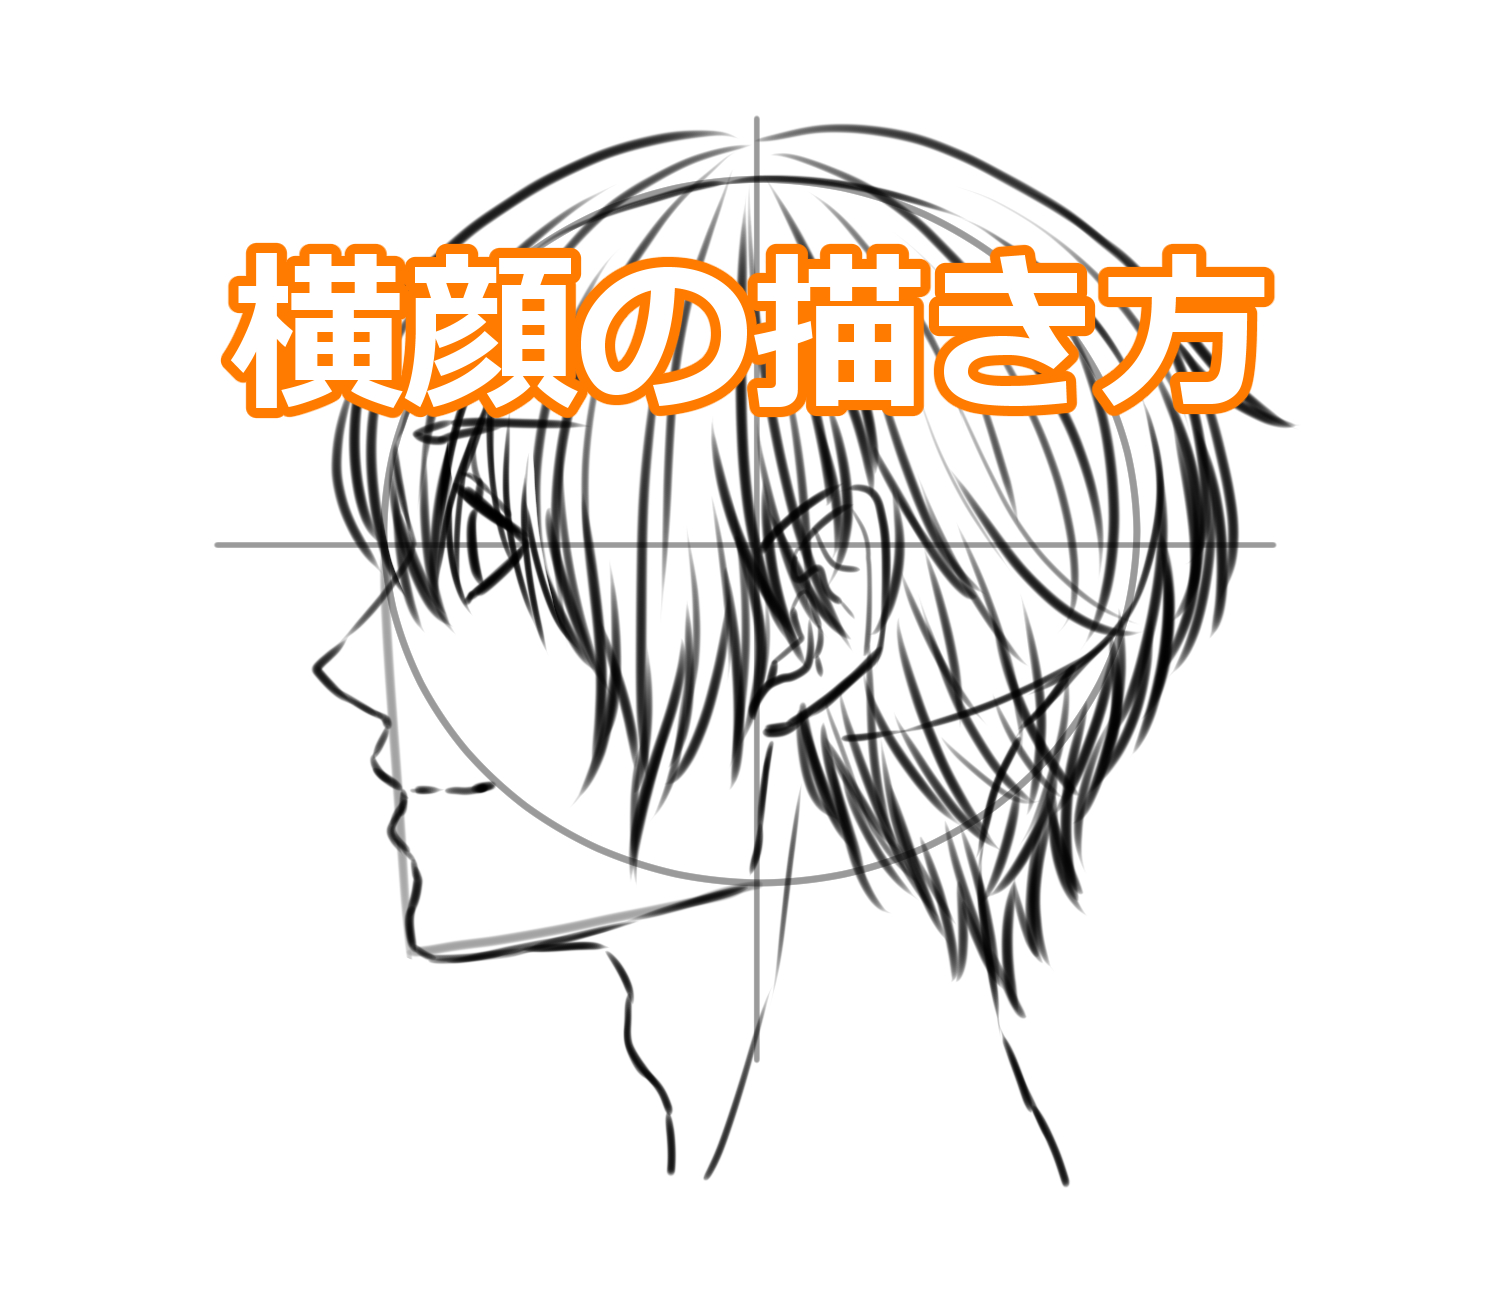
3.Applications (Differentiating by gender)
Understanding the overall picture
Let us review the overall picture using the video below.
This is played in x3 speed, and x4 – x5 for certain segments.
You can jump to this link for an explanation with diagrams and text only→ Drawing a sketch
Drawing a sketch
I can’t stress this enough.
Drawing a sketch is crucial for success!!
Lets face it. Drawing a sketch is tedious. It also makes the process to completion look ugly. Drawing without a rough sketch looks eloquent and is less time consuming.
However, beginners can easily lose a sense of balance in their drawing. As a result, it’s not uncommon for them to give up…I must also confess from personal experience that sketches were an extra burden. I used to draw free-style. And when I flipped over my paper… It revealed how asymmetric and off-balance my drawing was.
As an artist, everyone has the desire to draw better.
This requires practice upon practice. The quality of your drawing is reflective of how much you’ve drawn. The more you draw, the more you improve!
Some are talented enough to succeed without a sketch. Nonetheless, I suspect these artists also achieved this skill via repetition using sketches. Many professionals still start their drawings with a rough sketch.
As in any other field, drawing requires discipline to improve. So let us work together!
No surprise, I require a sketch for my drawings too. I can’t draw without one. Sketches for the win!
Apologies for the verbose introduction. We will now get kick-started on how to draw a face facing straightforward.
When we refer to ‘sketch’, aren’t you curious about how to draw one?
While there may be differences in how we each draw sketches… the general structure, location, and ratio of the human face and its parts are predetermined. This applies when drawing any other body part. Understanding the ratio of body parts would prove to be invaluable for your success.
In this lesson, we review the bare minimum you need to know about body parts and its ratio. There would also be a thorough analysis on each step. Hope you enjoy.
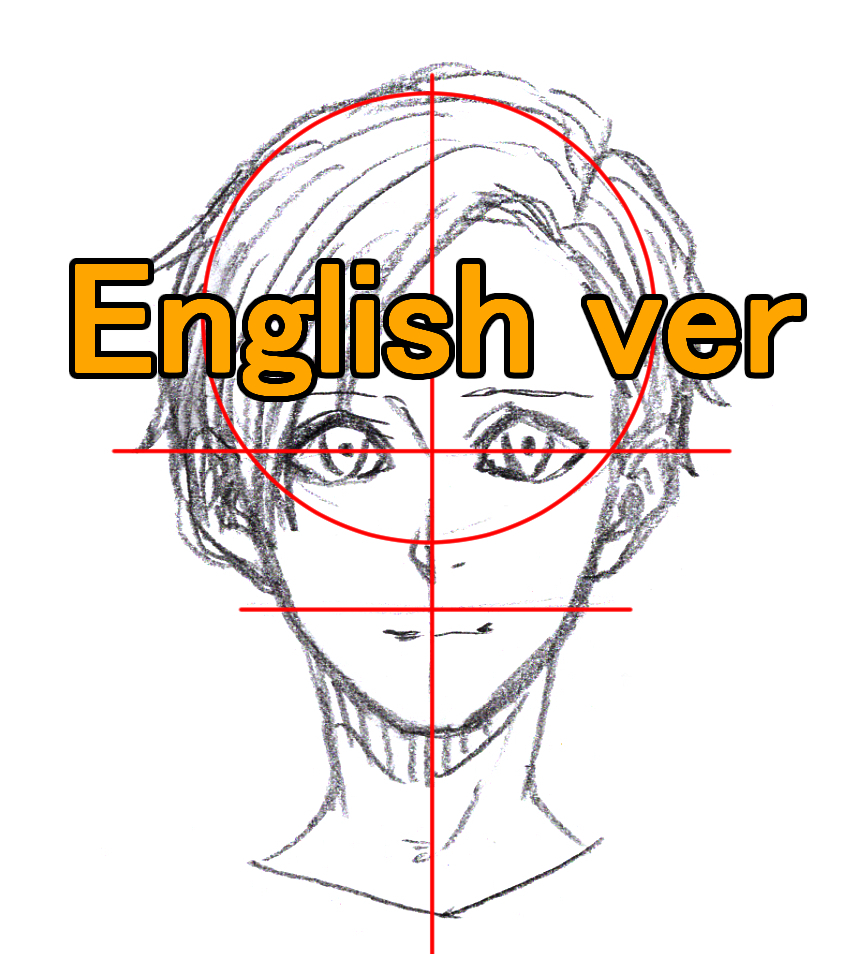
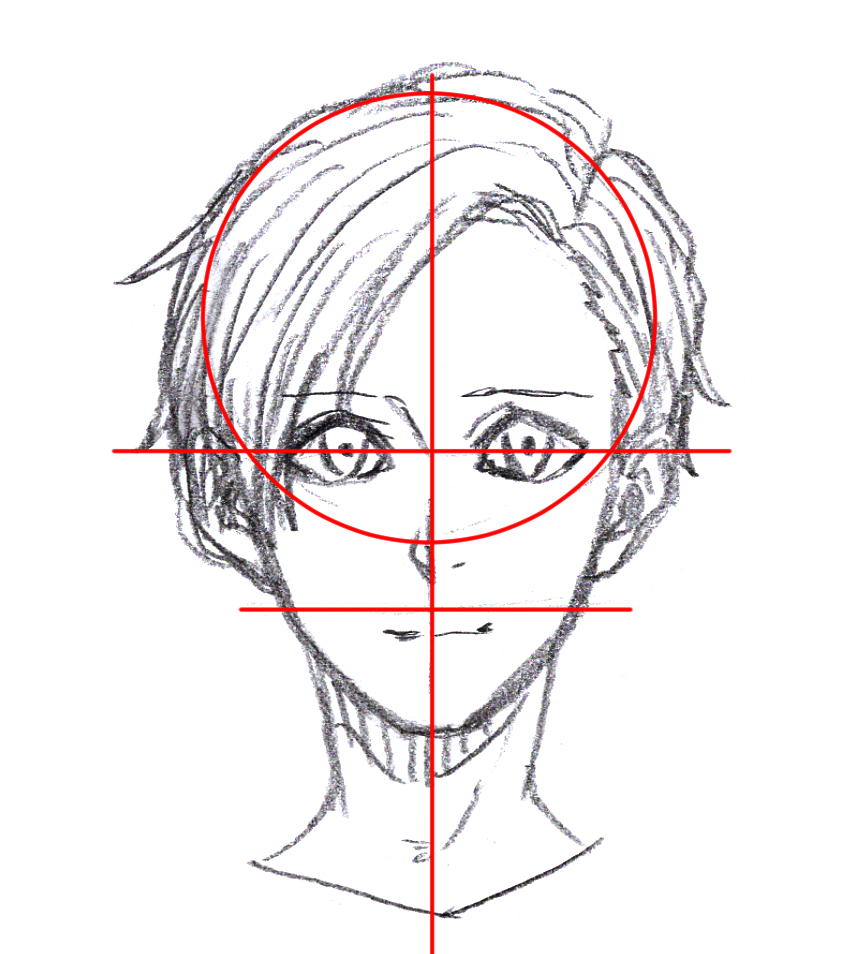
Drawing a sketch facing straightforward (The images below are that of a male)
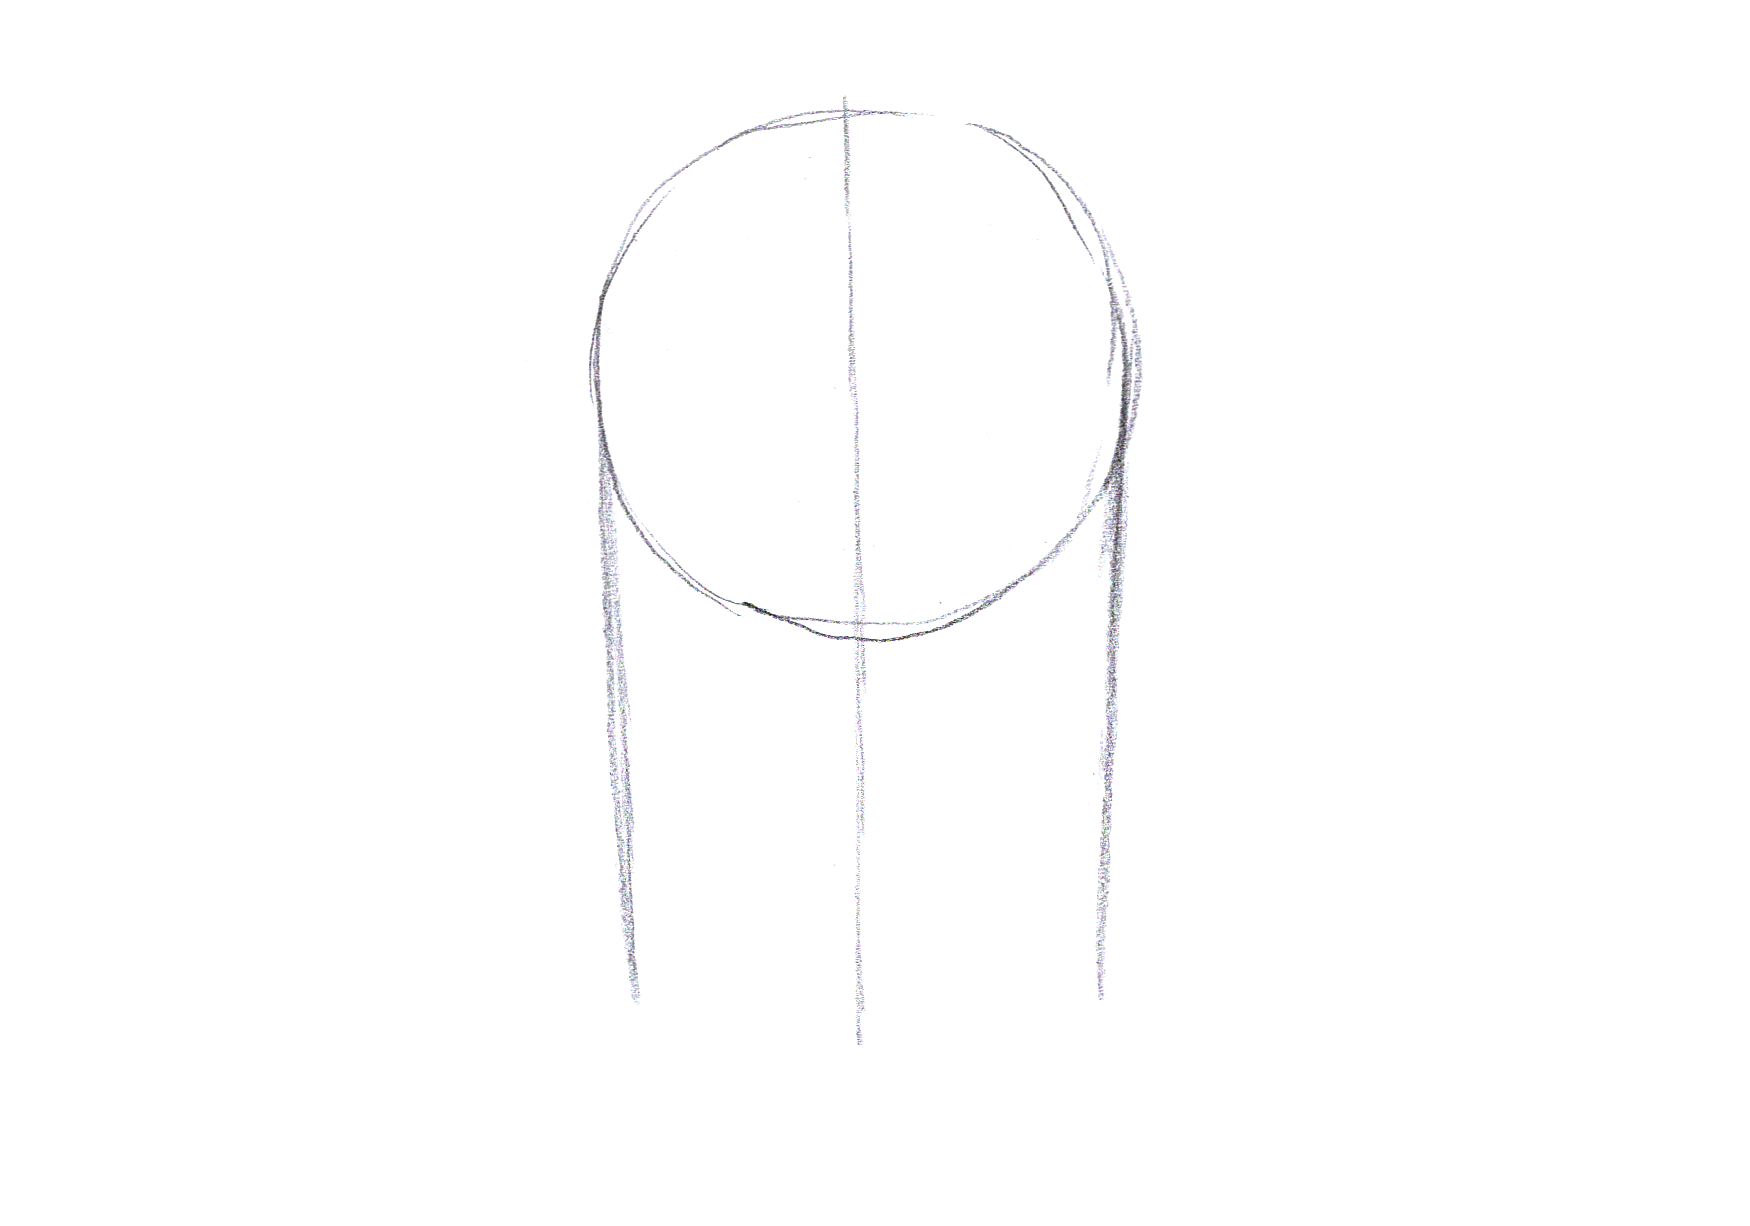
1.Draw a circle.
2.Draw a straight line through the center.
3. Draw two lines in parallel which are tangent to the circle (drawing free hand is fine).
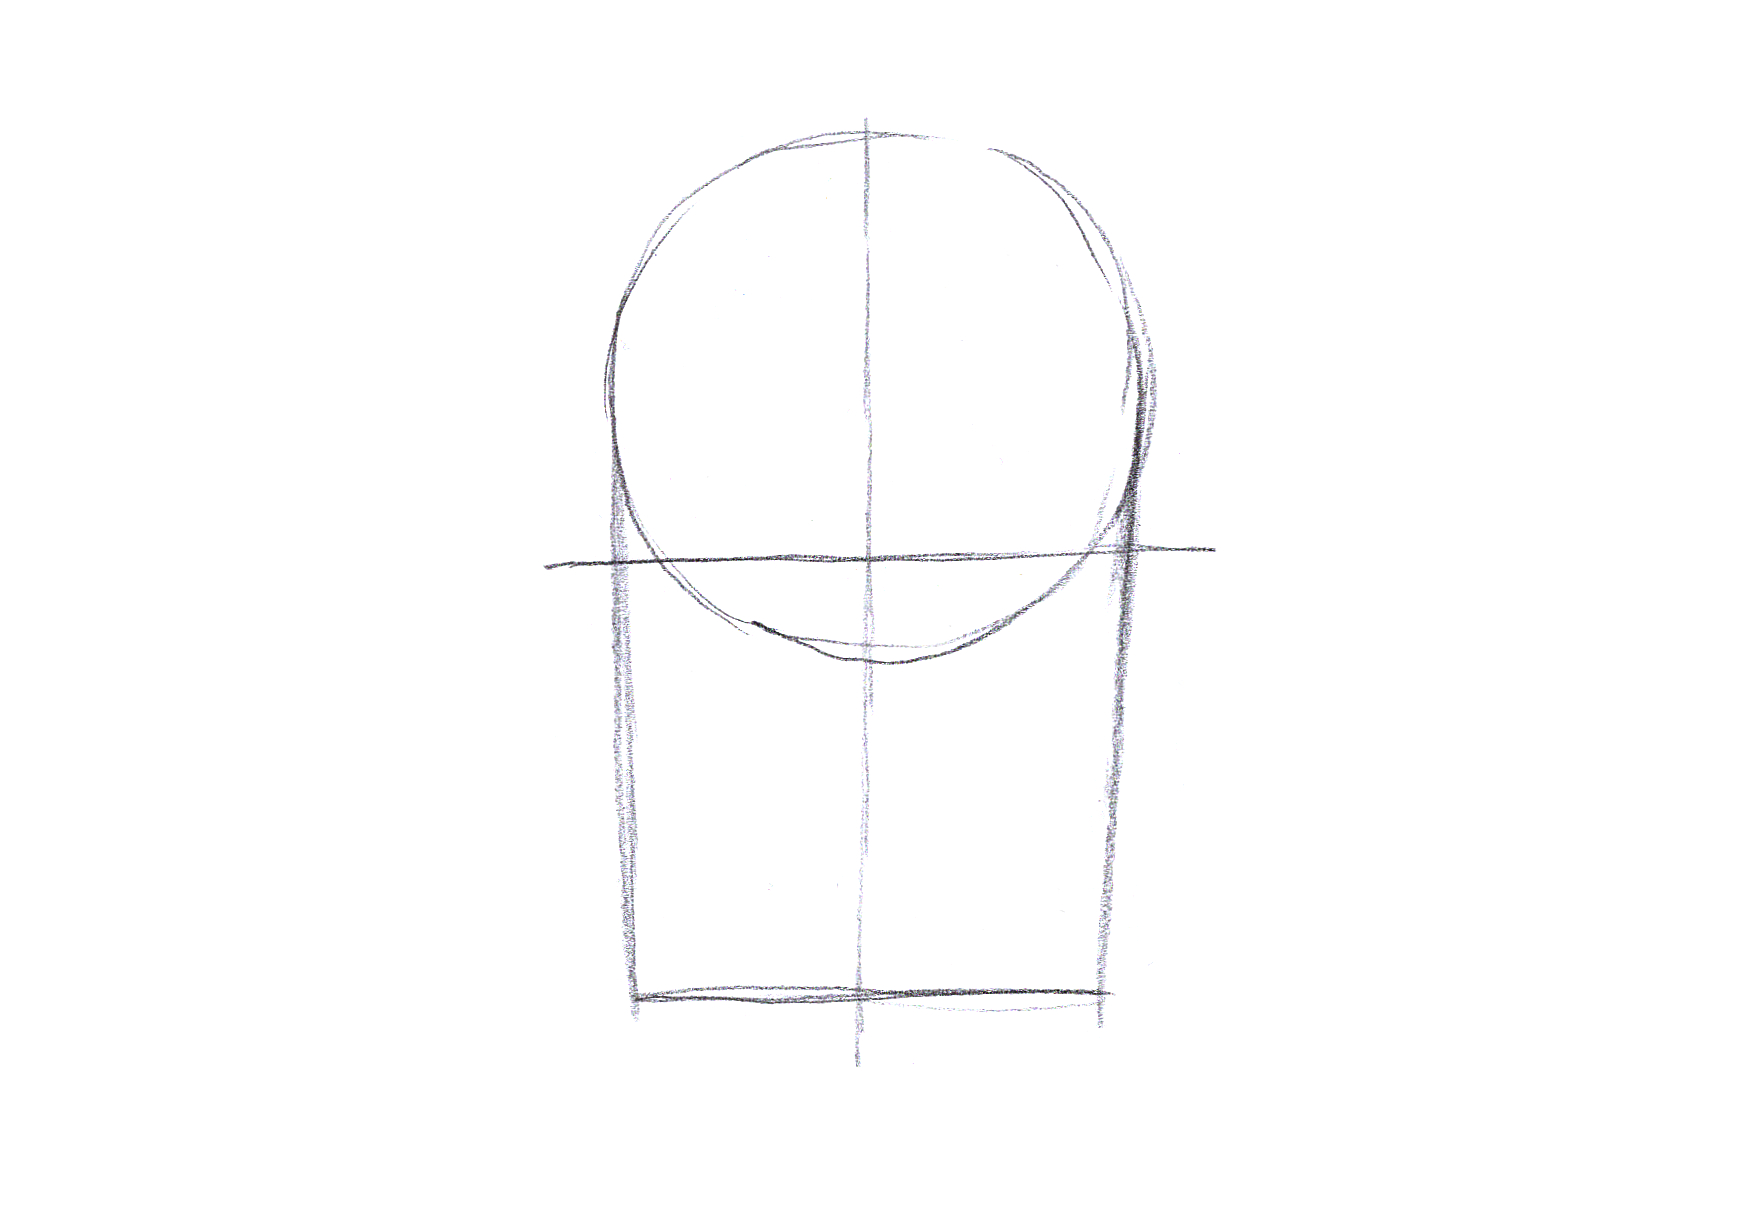
4. Draw a line perpendicular to the three lines, around the bottom of the circle.
5. Decide on where the chin would be. Draw a line perpendicular to the three lines.
(The location of the chin determines the age and gender. For example men would have chins further away from the eyes. This would be closer for women.)
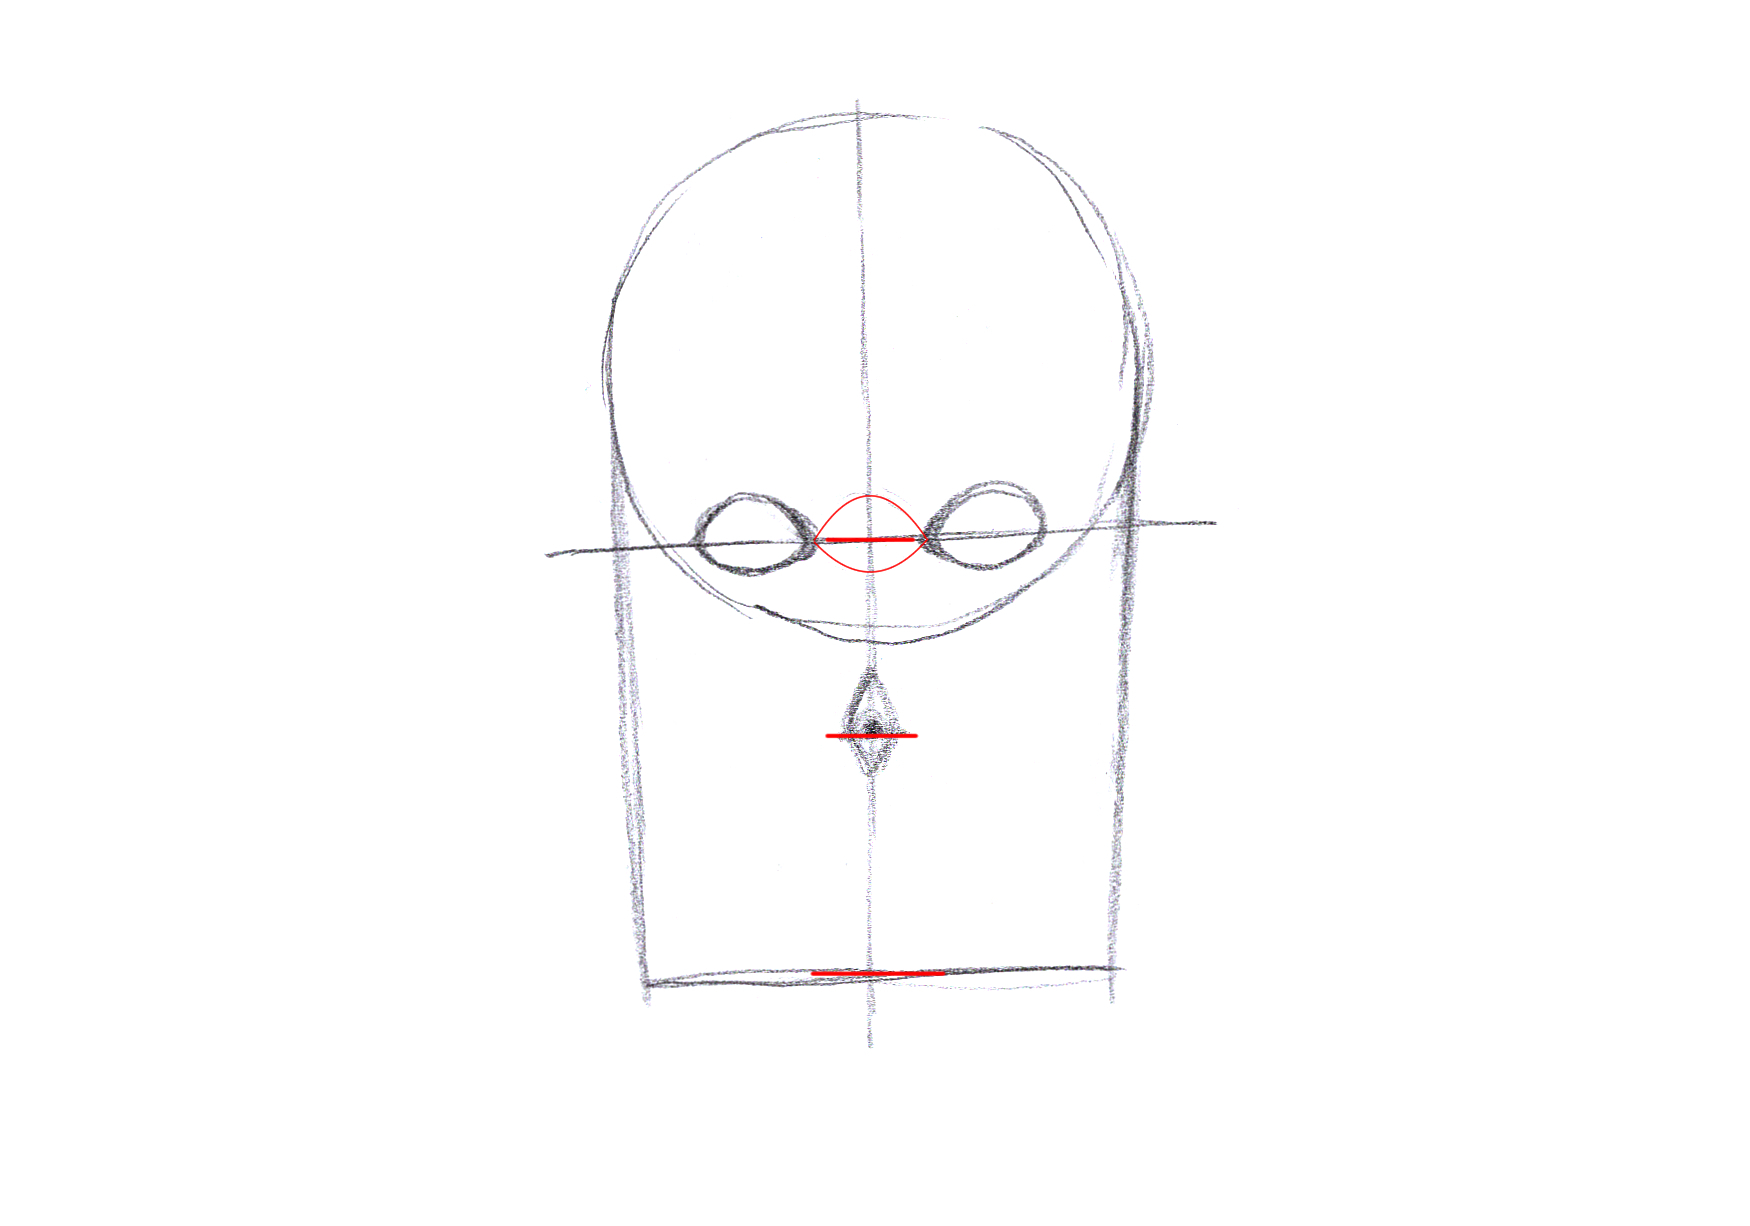
6. Draw a sketch for the eyes. Ensure the eyes are 0.5 – 1 eye apart.
7. Draw a sketch of the nose at the center of the rectangle formed by the eye and chin.
8. Draw a line crossing the nose, parallel to the eye and chin. Decide on the chin length and width.
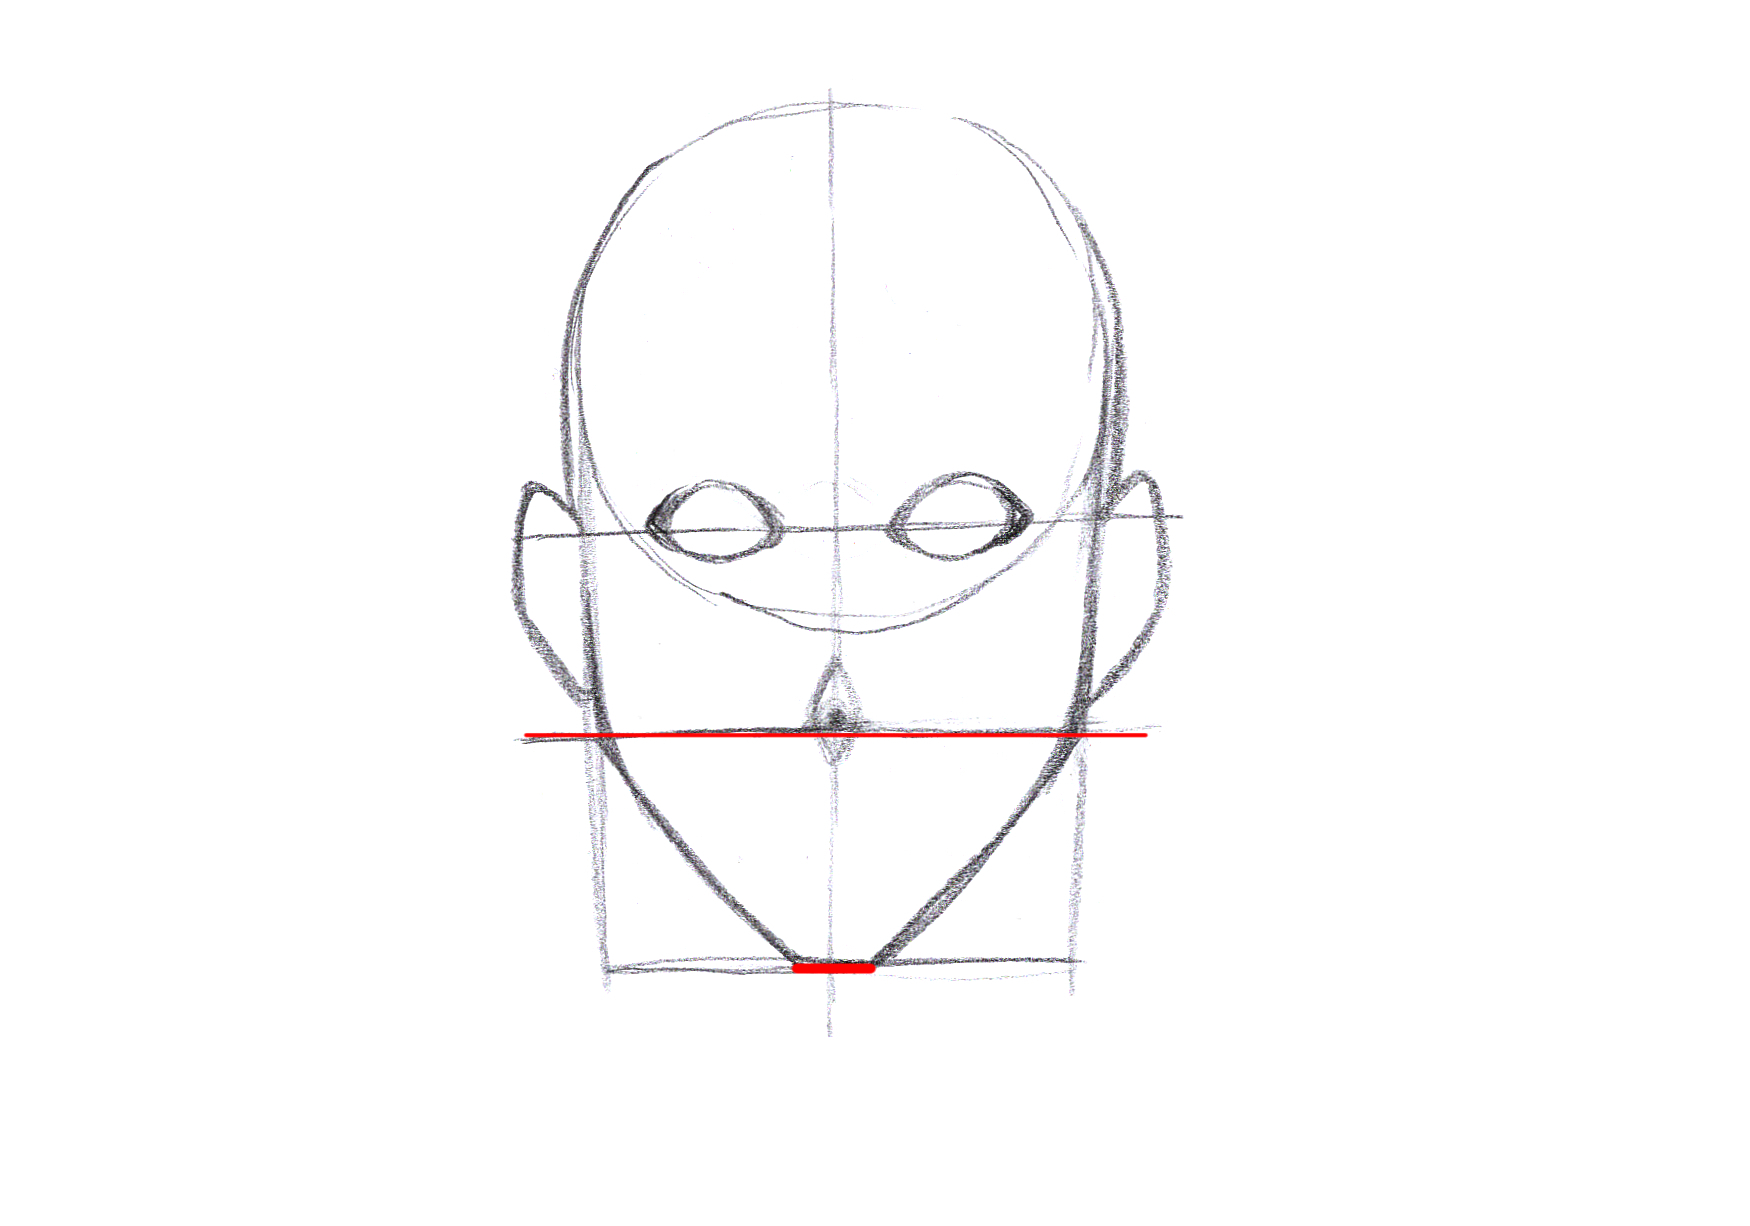
9. Draw a diagonal line from the two outer lines in tangent to the circle. This forms the chin.
10. Draw the mouth around a 1/3 of the way between the nose and tip of the chin.
This summarizes the basic ratio of a straightforward face. The book I used as reference had further details but… I firmly believe this would suffice in maintaining a general balance, hence the procedure above was simplified.
For further details, I recommend you read: 『デジタルイラストの「身体」の描き方事典 身体パーツの一つひとつをきちんとデッサンするための秘訣39』
Applications (Differentiating by gender)
The above documentation summarize how to draw a sketch. I would also like to briefly discuss how to differentiate by gender or skeletal structure.

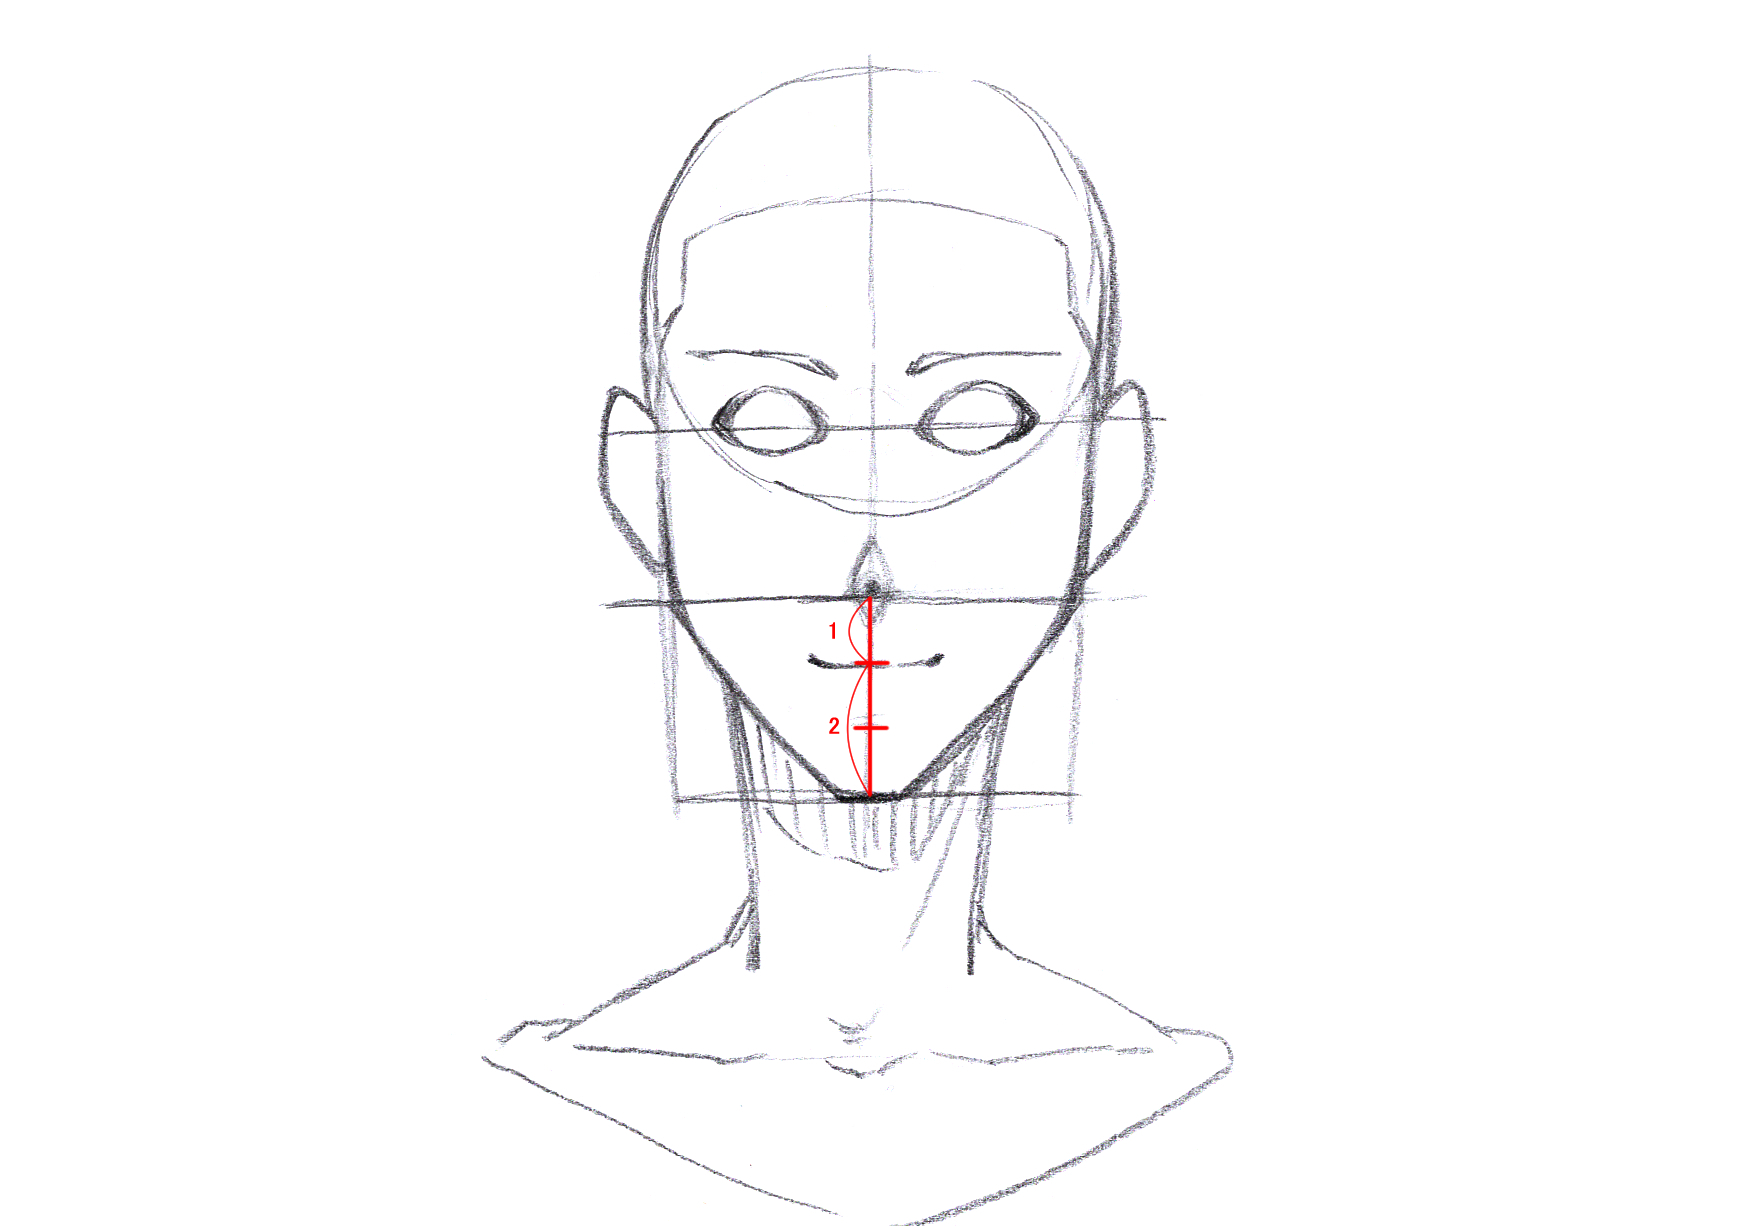
An easy way would be to alter the length between the eyes and chin. The longer this is, the more masculine your sketch would be. Conversely, a shorter distance would suggest a feminine or childish silhouette.
Likewise, you can draw different sketches of similar gender / age groups by varying the length of chin and location of the cheek.
In conclusion
This concludes a brief overview of how to draw a sketch facing straightforward.
With these basics in mind, you can fine-tune to achieve what’s best for you. This should help in reinvigorating the joy of drawing.
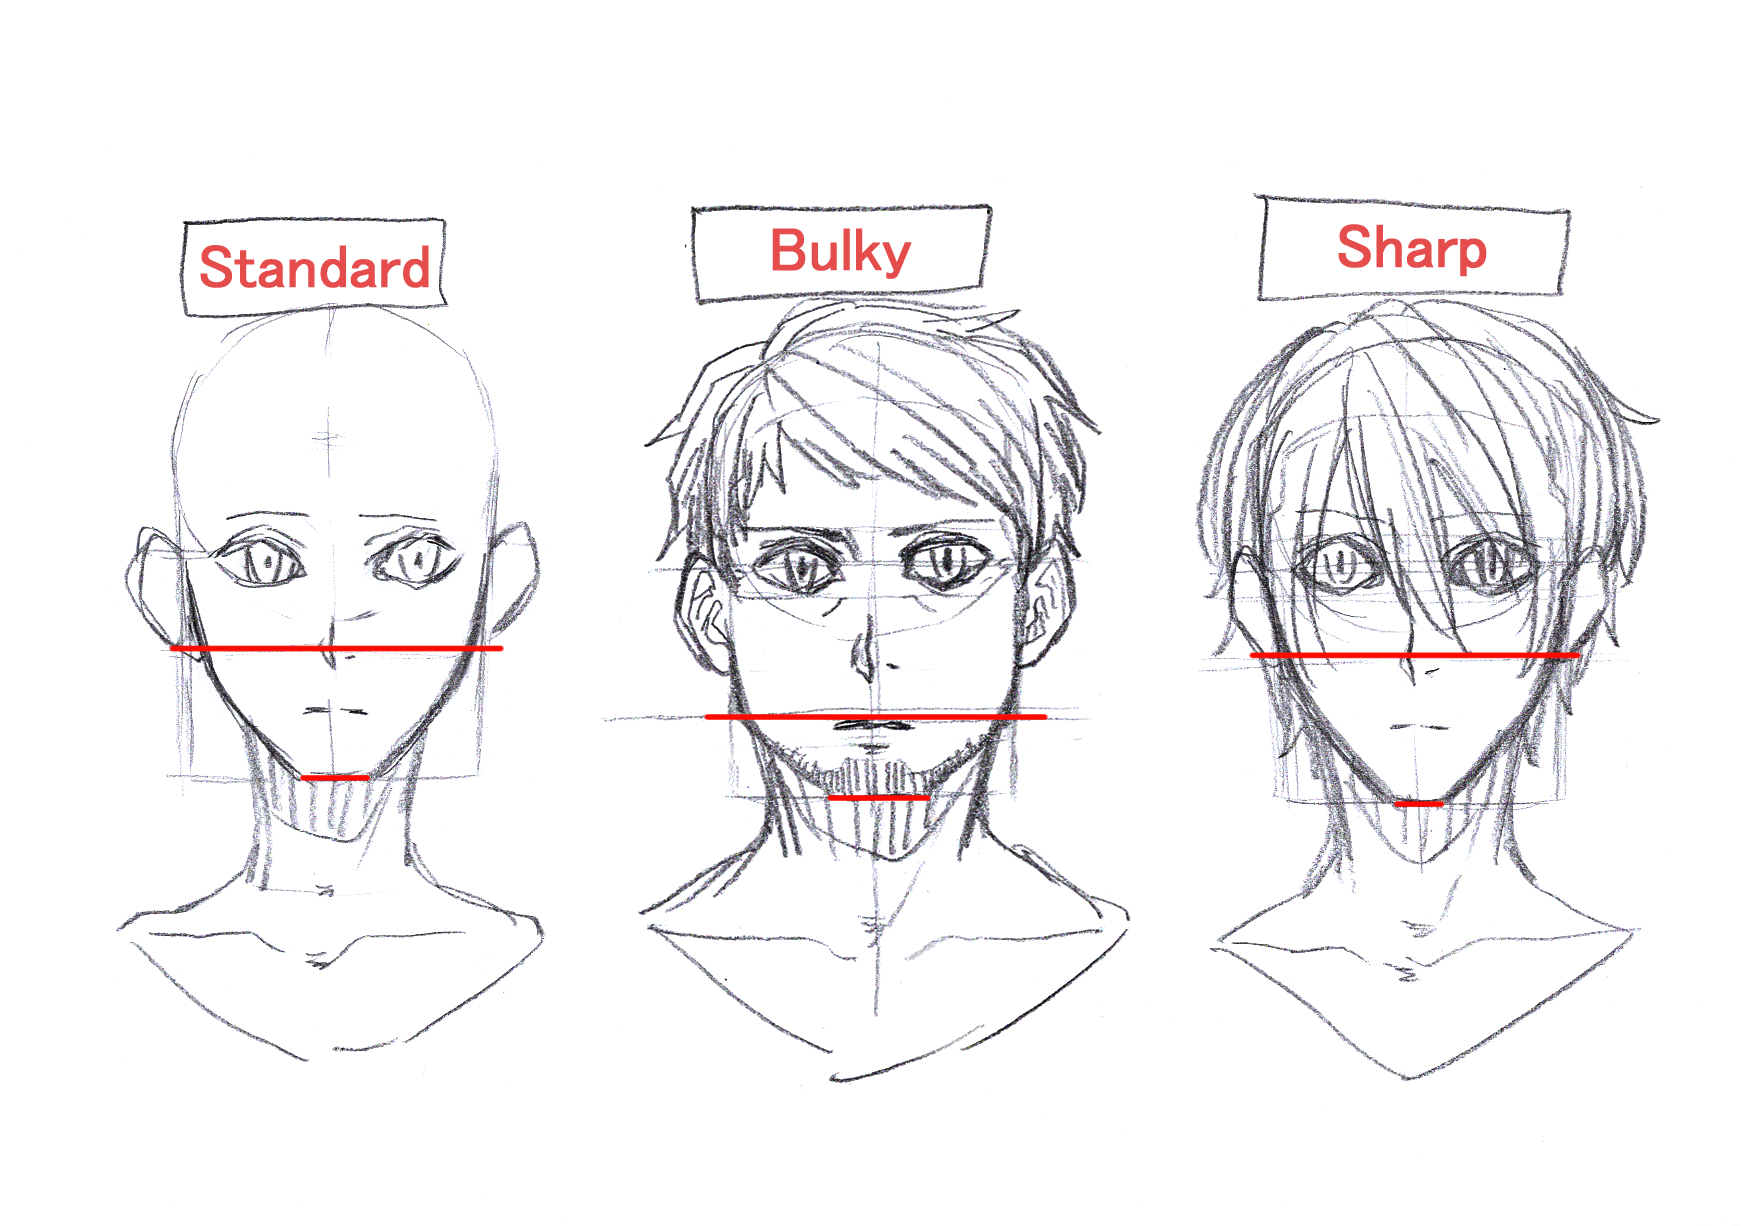
The illustrations used for this lesson followed the basics, hence they’re slightly different to my usual style.
↓↓I usually draw like this.
Sketches usually require the red lines that appear within the above images. When simplified, it may be just the circle and straight line through its center.
My drawings usually have thin chins. The line tangent to the circle does not extend too far after the nose.
I hope you can embrace these basics for your further drawing pleasure!

Please do not hesitate to contact me for any questions!
Also, I’m always open to lecture requests. Thank you very much for your attention.